
ข้อมูลในบทความนี้จะพูดถึงmoka หากคุณต้องการเรียนรู้เกี่ยวกับmokaมาวิเคราะห์กับPop Asiaในหัวข้อmokaในโพสต์Understanding the Moka Pot (Episode #2)นี้.
สารบัญ
สรุปเนื้อหาที่เกี่ยวข้องกับmokaในUnderstanding the Moka Pot (Episode #2)ล่าสุด
ที่เว็บไซต์Pop Asiaคุณสามารถเพิ่มข้อมูลอื่นนอกเหนือจากmokaสำหรับข้อมูลที่มีค่ามากขึ้นสำหรับคุณ ในหน้าPop Asia เราอัปเดตเนื้อหาใหม่และถูกต้องสำหรับผู้ใช้เสมอ, ด้วยความปรารถนาที่จะให้บริการข้อมูลแก่ผู้ใช้บริการอย่างครบถ้วนที่สุด ช่วยให้ผู้ใช้สามารถอัพเดทข่าวสารทางอินเทอร์เน็ตได้รวดเร็วที่สุด.
หัวข้อที่เกี่ยวข้องกับหัวข้อmoka
การจับฉลากสำหรับ FrankenMoka: *ตอนนี้ปิดรับสมัครแล้ว ชนะโดย Katerina จากสาธารณรัฐเช็ก! ดู Gabor สร้าง FrankenMoka: The Moka Pot (ตอนที่ #1): เทคนิคดั้งเดิมของฉัน: The Wired Gourmet Technique: 0:00 บทนำ 1:08 The Frankenmoka 4:26 การทดลอง #1: อุณหภูมิเริ่มต้น 7:31 การทดลอง #2: Grind ขนาด 9:33 การตั้งค่าการทำความร้อน 10:23 การทดลอง #3 พลังงานความร้อน 11:29 ขั้นตอนการสปัตเตอร์ 13:19 การทดลอง #4: การสกัดสะสม 14:23 การทดลอง #5: เมื่อใดที่จะตัดความร้อน 15:54 บทบาทของแผ่นทำความร้อน 19:20 การทดลอง #6: การใช้ตัวกรอง AeroPress 21:28 การทดลอง #7: กำลังบาน 23:03 การทดลอง #8: การต้มหม้อโมก้า 24:15 การทดลอง #9: อะลูมิเนียมกับสเตนเลส 26:56 การทดลอง #10: ขั้นตอนการต้มเบียร์ 30:16 Dilution 31:28 ปิดเพลง: “beatrix” โดย notize ลิงก์: Patreon: Limited Edition Merch: My Books: The World Atlas of Coffee: The World Atlas of Coffee หนังสือเสียง: The Best of Jimseven: ค้นหาฉันที่นี่: Instagram : Twitter: สิ่งที่ฉันใช้และชอบ: ชุดวิดีโอของฉัน: ชุดกาแฟสตูดิโอปัจจุบันของฉัน: แว่นตาของฉัน: ผลิตภัณฑ์ทำผมที่ฉันเลือก:
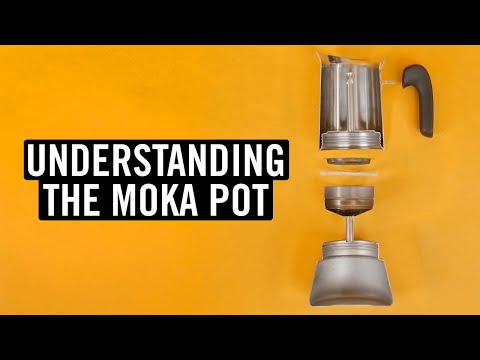
รูปภาพที่เกี่ยวข้องกับเนื้อหาของmoka
นอกจากอ่านข่าวเกี่ยวกับบทความนี้แล้ว Understanding the Moka Pot (Episode #2) คุณสามารถหาเนื้อหาเพิ่มเติมด้านล่าง
คำแนะนำที่เกี่ยวข้องกับmoka
#Understanding #Moka #Pot #Episode.
james hoffmann,james hoffman,jimseven,coffee,moka pot,moka pot coffee,how to use moka pot,moka pot espresso,how to make moka pot coffee,how to use a moka pot,moka pot recipe,moka pot tutorial,how to use the bialetti venus moka pot,best moka pot,bialetti moka pot instructions,bialetti moka pot,how to use moka pot for the very first time,moka pot espresso tutorial,moka pot coffee making,moka pot tips,moka pot espresso maker,modern moka pot,using a moka pot.
Understanding the Moka Pot (Episode #2).
moka.
เราหวังว่าเนื้อหาที่เราให้ไว้จะเป็นประโยชน์กับคุณ ขอบคุณมากสำหรับการติดตามmokaข่าวของเรา
Oh my lord these people are geeks. Just drink the flipping coffee! If it's not up to your standard then by all means dish out the cash.
Thank you for your in depth research! I always wanted to know whats exactly going on in my moka pot, but i was to lazy to install the requiered sensors in my moka pot myself.
those gas stoves make carbon monoxide. you should open a window.
Blah…blah…blah…blah
Why did you use 5 cups to measure the cummulative extraction, wouldn't just big one cup with some timer and weight measure work? record it and write it down so instead getting a measure every 20-30 seconds you get a measure even for every second.
I have a moka pot, but i genuinely have never made a good cup of coffee with it. Maybe once or twice a 'passable' cup.
My most common problem is that it starts to taste burnt/rubbery/like pencil shavings (when i grind fine, and gently push the grinds into the basket so it generates some pressure), or too bitter (when i just fill it up fully with moderately coarse grounds).
What is your opinion on reusable aeropress filters
Man I feel as nerdy as you as I'm watching this, and I don't know if I like it or not hahahahaha
Not to be that guy, but the solution to your problem regarding the boiling process is to add salt so your threshold to boil for the water is higher.
dilution works great with moka pots.. though i dilute it only a little. for every 100ml of moka pot coffee i add about 40ml of water
Is it only me who didnt understand or not, James say more liquid passed through resulted higher percentage of yield. But when it is already 1:3 in the upper chamber (i mean coffee : end result ratio) the liquid coming up gets blondy. Isn't that mean coffee puck is saying "i'm done"?
Subscribed.
I should also add this: take a class of water and start dropping dimes into a full glass of water and ask your viewers "how many before the water breaks tension and spills out?" as almost everyone gets this one wrong thinking maybe three to five when sometimes the number gets as high as ten or even twenty…meaning water is both incredibly DENSE (just weight one gallon to prove that) but also distilled H2O has in the world of chemistry INCREDIBLE bonding principles where when together wants to stay together then when apart wants to bond.
Makes for a truly awesome rocket when separated by way of example…but in this example when raised under both temperature and pressure will immediately start beading up upon the interior surface of the vessel providing a truly awesome amount of cooling in point of fact so again "creating a condenser" not a steamed product as is in done is say sous vide cooking.
You're technically building a condenser so yes, "steam" but then that steam cools and "beads" upon the inner side of the cooking vessel.
The "product" the VENTS ("coffee espresso") through the tube at the center as within the surrounding is a "cooling heated air flowing chamber" which being now injected with hot brown infused liquid PRODUCES steam and indeed very valuable steam at that as it can then be used to boil off your dairy product ("milk") which "safes" that protein for consumption and has exceptional benefits for one's health in every way.
Even more remarkable as created POTABLE so too PORTABLE or simply carry Along the Way ("The Via") this amazing to kind of wow and amaze to use as a way to "show your wares" as opposed to The Bazaar approach to retail.
“hob”?? A hob? What exactly is a hob?
I just plug my iphone app into my moka pot’s usb port, and leave it on Auto.
Right?
Try using boiling chips in order to smooth out the boiling, and prevent unstable sputtering.
Thank you so much!!
A bit late on the serie, on my Mokka pot, I put a bit of water on the top reservoir, it helps cool a bit the water as it pass through the coffee. It's just my feeling, maybe the taste is different only because of the excecive water compared to a normal brew or another variable. Would love to have insight on this.
steel is more dense material so it conserves more heat
Actually, there are many more negative reviews for the "stainless steel" brewer than the prototypical one.
I haven't watched him for ages. Nerdy is right. Brilliant though.
Bean to cup machine for me and single origin beans from Costco online.
Espresso is a drink, not a hobby
Always had a preference for stainless over aluminium. And have developed my technique though feel, mainly ear. I have what I’d describe as a Brutalist application and get a fairly good consistent result. 6 cup Venus model.
So what grind size do you recommend? Specifically if using a eureka Mignon specialita
James really went in the lab here.
Amazing deep dive. Fascinating. Love the nerdiness. Thank you!
The annoying thing with this brewer is the inability to produce consistent results. What I do is to use a thick stainless steel pot/pan as the base for the brew to be on top. The stainless steel pan is heated high heat When the coffee starts to come out, I kill the flame and move the pan out of the stove. The temp is more consistent and flow is more gentle and consistent but again, you just cannot produce the same result every time even with consistent weight of coffee ground and amount of water and even with the same temperature of water going to the Moka pot before brewing.
Does anyone know the weight of coffee each size of Moka Pot holds? I can't find any videos where the grams of coffee is mentioned with the brewer size. Thanks!
Holy shit. This was a very enjoyable video, but it's totally true that sometimes it is just better sometimes for your general sanity to pretend you did not see it. Just forget and continue brewing like you used to.
i haven't even tried a cup of coffee once in my life.. why am i watching these
Dear James, thank you for your videos, they’re all great. And it’s amazing what you did here. The results are super interesting and the whole thing motivated me to explore the taste from the moka pot a little further. Here are some results I’d also like to share. Maybe it will be useful for some moka pot lovers. I am using Bialetti Venus for 2 cups (but de facto 1 cup, as will be shown below):
Since I wanted to come close to a real espresso and macchiato (with limited means), I realised that, apart from the grind setting, nicely prepared puck, water temperature, prevention of sputtering etc. + in case of macchiato controlled (minimal) bubbling of milk in the French press, I need to develop a sense of how long the contact between coffee and water would be before the first drops come out. We are aware of that correlation, but that doesn’t necessarily make things easier. Also, although it’s unquestionable that the extraction is almost linear, more water means dilution and, therefore, moving away from the espresso taste. Finding a compromise between intensity and pleasant/subtle/full taste has been a little frustrating experience, but some interesting results have been achieved (even on a gas flame).
Medium (and towards darker) roasts: With 11 g coffee in, I’m now usually happy with around 35 g out (+ – 2 g) only. The grinder (Timemore C2: 10-14 for espresso) is set to 14-16 clicks. I’d use 14 if the bean is more subtle, let’s say. The starting water temperature is 100°C. If I’ve got some arabica, I’d remove the pot from the heat just a few seconds after the coffee comes out, and if I’ve got a blend, the pot would be heated maybe a few seconds longer to brew a little faster due to the risk of getting more bitterness than desired. When using medium or darker roasts with a bigger pot (classic aluminium moka 4 cups), I realised that preheating the water in the moka pot itself (without the upper part) makes sense to accelerate the brewing time and, again, to avoid the unwanted bitterness.
For a lighter arabica roast (such as illy Etiopia) in a 2-cup-Venus, 12 g of coffee fill the puck properly and the same grinder is now set to 12 clicks. I was not happy with the starting water temperature at 100°C, the coffee was too sour. But if the water temperature is around 80°C (and everything else remains the same), the longer brewing process enables quite a strong and yet well extracted light roast coffee. Additionally, controlling the speed of the coffee coming out can be considered for fine adjustment.
Until last winter I was mainly drinking Turkish coffee and then through the moka pot I discovered a certain sweetness of coffee I had experienced only in good cafes until then. Your videos have undoubtedly influenced my appreciation of coffee and opened up a whole new level of experience. If there is anything that doesn’t make complete sense and might be the result of pure subjectivity or autosuggestion, I’d be happy to read some thoughts. Cheers 🙂
What is that brush called that James used to stir the grinds in the filter to eliminate any clumping? I can’t seem to find the right search terms. Thanks
you need to go in a Napoli home!
I personally use 2 large L iron brackets on my induction. It works like a charm, but you don't have any handle afterward ^^
I agree that it's not necessarily water evaporation that starts the extraction but thermal expansion of the air trapped inside. This is easy to test… If you overfill the water chamber (use less air) you'll see that it takes much longer to start the extraction and I bet the temperature will be much higher since you'll have to wait for more steam to develop.
These things are easy to operate.
Boiling water in the cold base, place funnel in the base (so it's also hot), then add the coffee (medium roast typically) to the brim but don't tamp it down (the pressure comes from the bottom up and not from the top down as you would for an espresso basket. Tamping it will only cause the water to create channels in the puck and not extract from the whole puck). Meanwhile, preheat the hotplate (very important to reduce the time on the burner).
Connect all the pieces together with a teatowel (so you don't burn your hands and can really screw the pieces together nice and tight) and place on the heat source. As soon as liquid comes up, kill the heat but don't remove the pot just yet (by this stage you have enough pressure to do the job and any more will drive the heat and pressure up).
Once you hear the pot change sound (shallow water bubbling sounds different), remove from the burner and let it sit for a couple seconds (residual heat and pressure to get the very last little bit). The second it bubbles, pour in your favourite cup and enjoy.
I'm always in a fight to reduce over extraction in my Moka pot, and there's this timing for removing it from the heat and cooling it down that's just so random. Sometimes it sputters violently, sometimes I feel like I could have extracted a wee bit longer… It's just not a precise instrument.
What would happen if you tamped or slightly packed the coffee grounds?